Hey Guys! I hope you are all doing well in spite of the virus that is going on. Stay safe and be aware of the situation. Here is a good link for your reference.
For today’s blog, I am introducing #quicktip content to share with you a small feature in Dynamics 365 that deserves some attention. If you are already aware of this then that’s great, if not, I’m happy you found this page.
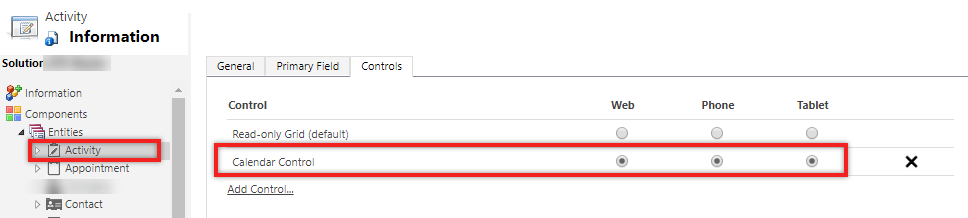
Our Quick Tip is about the out-of-the-box (OOB) Calendar View that we can use in viewing Activities in Dynamics 365.
Setting the Calendar Control will give your users a calendar view of all their activities marked on due date.
And even if its in calendar view by default, you can always revert it back as list. Check this out.
Did you know that you can generate a Dynamics 365 Document Template through a workflow? By using the OOB SetWordTemplate action, you can automate the template generation in a real-time or background workflow.
The SetWordTemplate action automatically uploads it in the Notes entity.
Now, what if you need to get that actual Document from the Notes and attach it in an Email as PDF. This is where Power Automate comes in handy.
You need to set Trigger Conditions to ensure that you are only triggering this flow if the Note (annotation) has an attachment (isdocument) and for a specific object type. In my case, I only filter Notes that are created in the Contact entity. Check out this quick video.
Then, in order to get the actual content type of the Note Attachment and before converting it to PDF, I converted base64 to binary with the following function:
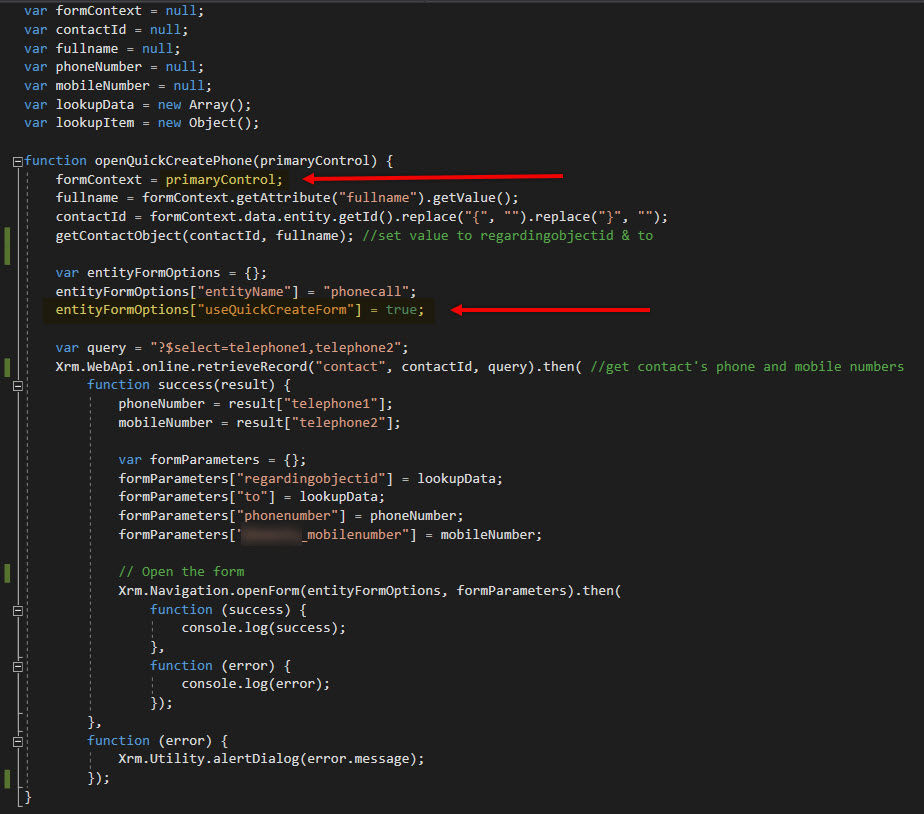
The requirement is to add a ribbon button so a Customer Service Agent can easily create a Phone Call with minimal clicks in the Unified Client Interface of Dynamics 365. We will also auto-populate the values in the Phone Call form.
Step 1: Create a web resource js file where you will write the custom script to open the quick create phone call form.
Step 2: Add a custom ribbon button in the Contact form using the Ribbon Workbench.
Tip: Make sure that the solution you will open in the Ribbon Workbench only includes the entity you need to modify without all the assets. This will make publishing quicker.
Step 3: Add a Phone Call command in the Ribbon Workbench with CRM Parameter of PrimaryControl. This is the executionContext where you can easily get the attributes of the form.
Activities is a list of all activity types such as Email, Phone Call, Task, Appointment, Fax, Letter, etc.
Queues is a place where you list both activities and cases in the same view.
Depending on business needs, you can recommend either one to manage all action items recorded in CRM. Some business users, they prefer looking into separate views, however, some businesses have multiple teams and it will be beneficial for them to use queues instead.
Here are the most important information you need to understand and know when considering Queues vs Activities.
QUEUESFEATURES
It is required to setup a Team to use Queues. This way, you can easily manage the members’ action items and their security role.
The activities and cases inside a queue is called a queue item.
Users can pick a queue item as needed.
Picking a queue item updates the Worked By field/column. This also updates the record’s owner field.
Users can route a queue item to another Queue or User.
Users cannot route a queue item to a user who is not a member of the Queue that owns the queue item.
A queue item can be delegated to another user who is not member of team by assigning the specific activity or case (just like any other records in CRM).
Releasing a picked queue item will automatically be routed back to the Queue even if you have assigned the activity or case to anotehr user. (Worked By will be empty / Owner == Team)
When displaying an Activity Status in queue, it will be a separate column per activity type unless you add a custom script. This applies with other fields like Due Date, Priority and other important fields. Thus, heading to a separate view for Activities and Cases are helpful.
Activities will stay even if the business chose to use Queues. There are certain users that does not work on Cases which means, Activity Views are good enough for them to manage their action items.
I personally love learning and has always been passionate on sharing my knowledge especially if it’s about improving productivity.
In the past years, I have the ultimate go-to tool when it comes to tasks that require repetitive configuration. This type of job can be “easy,” but it can be very frustrating and very time-consuming.
This is XrmToolbox. It’s a FREE tool that uses Common Data Service for Apps as its foundational data service built to make administration, customization, or configuration tasks more manageable and less time-consuming. There are more than 100 tools available in the Tool Library, and here are some of the tools you can find:
User Security Manager – Use this tool to manage multiple users with multiple Business Units and Teams.
User Settings Utility – This comes in handy when you get a requirement to set default pane, tab, dashboard, etc. to multiple users or roles.
Workflow Buddy – Working with a vast Dynamics 365 project with several workflows can be very challenging when it’s time to troubleshoot. Although the Dynamics 365 Advanced Find can help, this tool makes it much easier to find a specific workflow.
Option Set Editor – Edit all your Option Set in one window. This editor is a life server when dealing with several local option sets in your environment.
Open Records using GUID – When it’s time to troubleshoot and look for a certain GUID, instead of exporting records and finding it manually, this would be the best tool available.
As I have mentioned, there are more than 100 useful tools available in XrmToolBox. Few of the popular ones are Ribbon Workbench, FetchXML Builder, Entity Relation Diagram Creator, Solution Transfer Tool and a lot more. Whether you are administering Dynamics 365 or managing solutions, troubleshooting or customizing it, this tool is something you must pin in your taskbar.
Today, I will share with you some tips and tricks when adding custom scripts in your Dynamics 365 application. Here, I shared some of the common scenarios that may require you to write codes. The following scenarios are just examples; you might encounter different requirements, but the same solutions can be applied, so keep an open mind. I thought a one-page reference would be of good help, especially for those who are just exploring Dynamics 365 customization.
Scenario 1: Run a script on form load but ONLY when creating a new record.
Solution: Get the form type of the record and use it as your condition to ensure that you don’t load ALL scripts on every form load.
Syntax: if (formContext.ui.getFormType() === 1)
Value
Form type
0
Undefined
1
Create
2
Update
3
Read Only
4
Disabled
6
Bulk Edit
Form Type Return Values
Scenario 2: Every time you open a form, it says unsaved changes. This is because your form is dirty which means there are fields in your form that have changed. To find out what these fields are, you can use the developers’ tool available in your browser.
Solution: Press F12 while running Dynamics 365. Run the following script in the console and it will tell you the fields that you need to deal with.
Syntax: Xrm.Page.data.entity.getDataXml()
Scenario 3: You are required to set a value in your scripts which is only intended to control logic in the form. This becomes a dirty field.
Solution. Set submit mode to control how you want to save the field you changed programmatically. If you are not interested to store the value, you can choose to do so by setting the submit mode it as “never”.
Scenario 8: Need to pass a parameter when a certain field value has been changed.
Solution: Add the script file in the form properties and define the JS function in the onchange event of the field. Enable pass execution context as the first parameter.
OnChange Field Properties
Syntax: functionName = function (executionContext) { var formContext = executionContext.getFormContext(); }
Scenario 9: You are required to display a notification message on the form.
Scenario 10: You are required to display the field values from another entity or table.
Solution: Instead of re-creating those fields in the same entity create a Quick View Form. Another way is to create calculated fields to feed the field value of another entity.
Learn more about the Powershell cmdlets here. It is in preview mode but users with a valid Power Apps license can perform the operations in these cmdlets. Note that you can only perform these with the resources you have access to. More information here.
Note: Environments that can be restored are environments deleted by an administrator and not those deleted by the system due to license expiration and other scenarios.
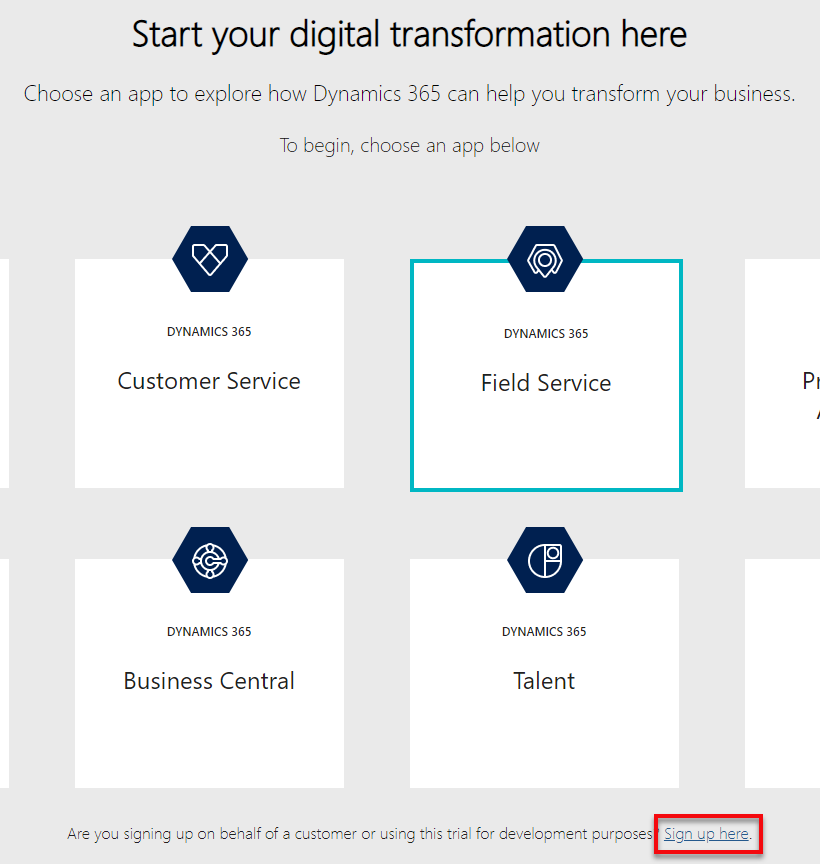
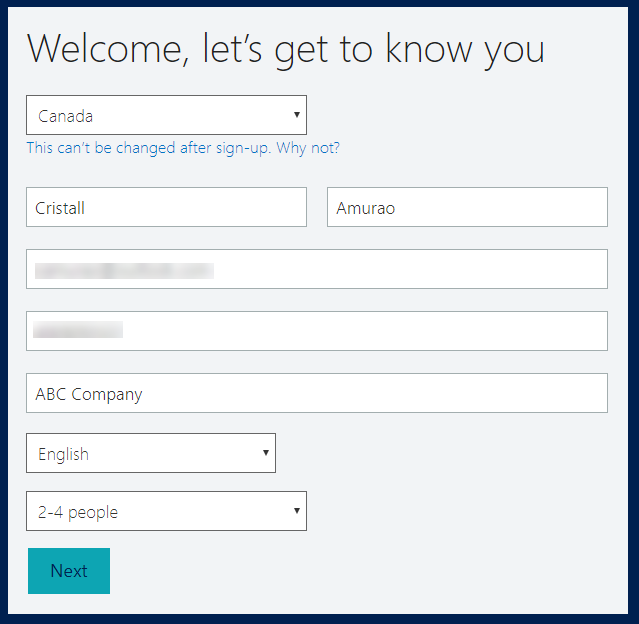
Looking to kick off Dynamics 365 Field Service trial environment with demo data? Well, you’re in the right place.
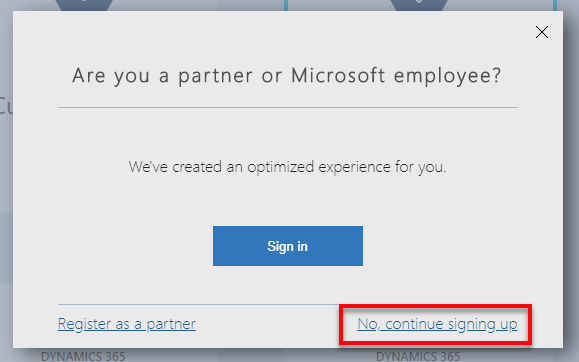
Make sure you have a valid email address and phone number. It does not have to be a work email. You can use an outlook account like what I did in this demo. Then, go to Dynamics Trial, select Field Service and click on Sign up here.
Once it’s up, you can start preparing the demo data installation.
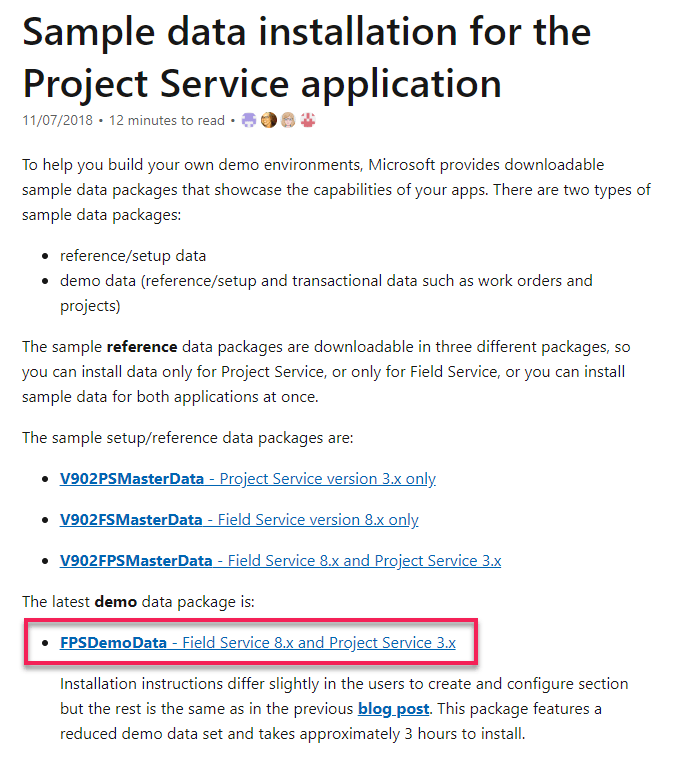
There are a bunch of things you need to pre-configure before you can install the Fabrikam Manufacturing Demo Data.
Download the demo data and unpack. For US consumers, you basically just need to follow the steps on this link. For non-US consumers, you may have to encounter some other issues like date format, etc.
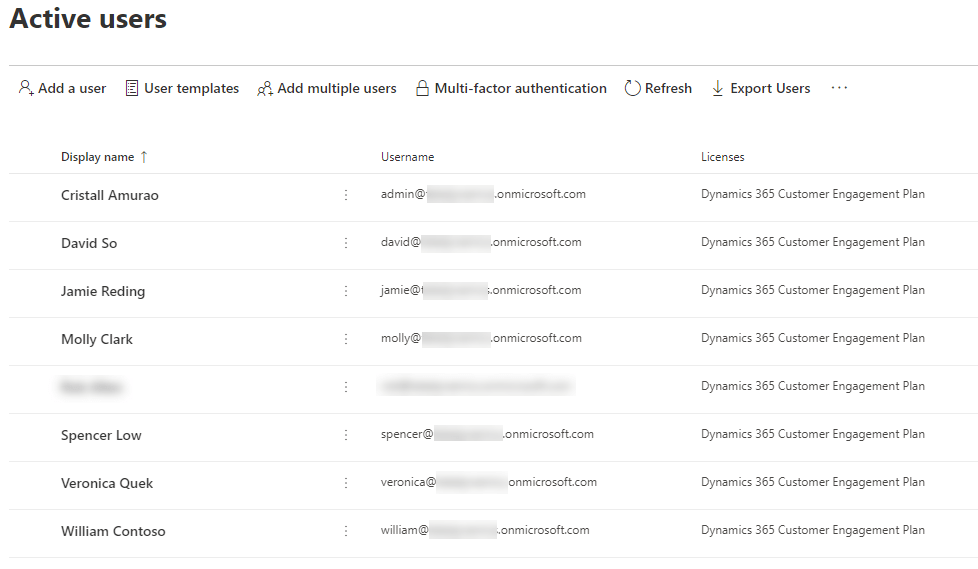
2. Create and configure users in Office 365. Make sure you assign Dynamics 365 license for each of them so their names will appear in Dynamics 365 Users list (Settings > Security > Users). Keep notes of the username you set for each of them as these are important for the configuration later on.
3. Once it appears in Dynamics 365 users list, set System Administrator role to each of them.
4. Go to the extracted Demo Data file (PackageDeployer_FPSDemoData_v3007) you just downloaded and open PkgFolder and then find and open ImportUserMapFile.xml. Now, paste the email address you created for each user in Office 365. Also, set the DefaultUserToMapTo= field to the email address of the Spencer Low user.
5. In the same folder (PkgFolder), find and open DemoDataPreImportConfig.xml and find the <userstocreateandconfigure> tag. Update the <login> tag with the username (case-sensitive) you set for each user from step 2.
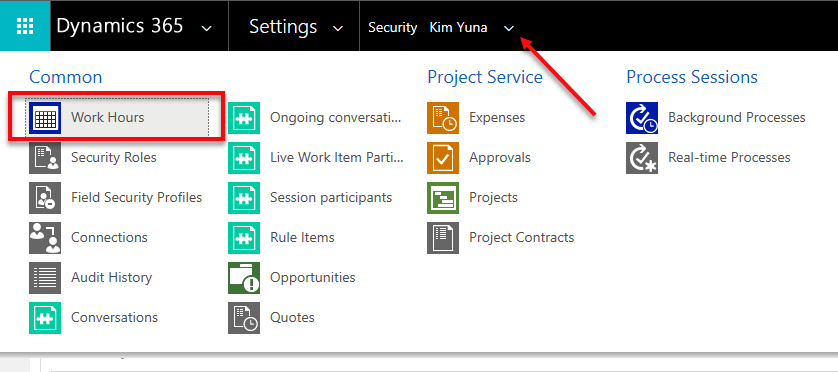
6. Setup a work hour template for Spencer Low. Navigate to Settings > Security > Users, find/open “Spencer Low” user.
While in the user form, navigate on the top menu and select Work Hours.
Click on the calendar and select More Actions > Edit. Select Entire recurring weekly schedule from start to end option and ensure the Work hours are set to 8 AM – 5 PM (9 Hours), Monday to Friday and with the Timezone set to Pacific Time (US & Canada). This is needed to ensure that the Project and Schedule board show as expected.
7. Before running the Package Deployer, check the following in Advanced Find to avoid encountering issues during the installation.
Confirm that there is no more than one active Organizational Unit record, and then renaming it to Fabrikam US.
Confirm that there is no more than one active Work Template record.
Confirm that there is no more than one active Project Parameter record, and then renaming that entry to Parameters
Common Issues & Fixes:
The pre-import process failed: Organisation should have no more than one active ‘msdyn_organisationalunit’ (fix: step 7)
The pre-import process failed: ID for the user with login ‘davids’ not found (fix: step 5)
Renaming Default Work Order Template failed with error: ID for User with login ‘davids’ not found (fix: step 6)
Now, you are ready to run PackageDeployer.exe.
Let me know how it goes in the comments down below.
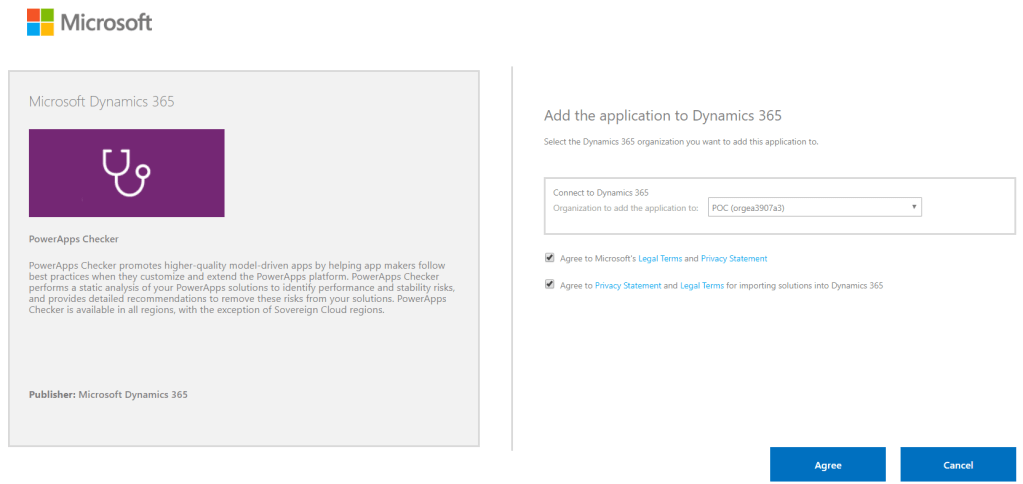
If you started your implementation with an older version of Dynamics CRM and had converted to the latest version or to using Unified Client Interface, and you want to ensure that your solutions are written based on best practices, Solution Checker will come in handy.
December 2018 when Microsoft started to feature it in public view. Based on the customers that used it, it helps them in resolving lots of issues and have seen 20% performance increases on their form loads.
How to get started? Go to the Power Apps portal and head on to Solutions. Select the solution you would like to check, and you will see the Solution Checker button.
For first time users, it will show you an option to install the solution. Installing it will direct you to the AppSource site. Click on Get it now, and it will redirect you to a page where you need to select the environment you would like to use it for. Click Agree and wait.
AppSource: PowerApps Checker
Note: Every new and existing CDS for Apps environment will now have the solution installed automatically
Before you are able to run it, make sure you have the proper Security Roles in your common data service environment. Two of the required permissions are Export Customizations and Solution Checker.
Required Security Roles to run Solution Checker
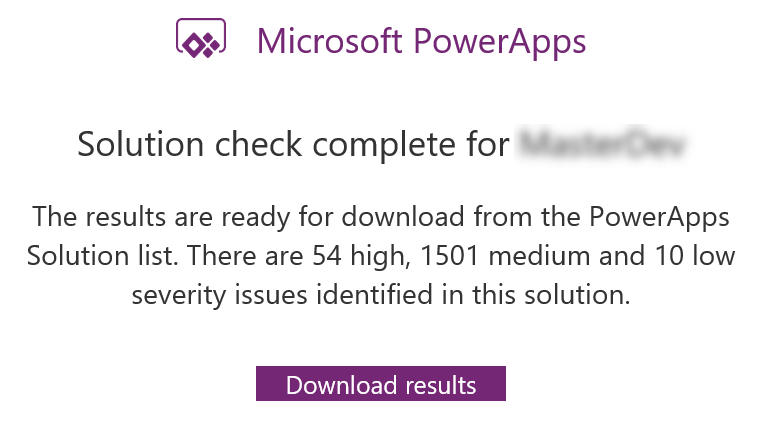
You know when it’s done when Power Apps sends you an email with the high level results.
What I really like about Solution Checker is the flexibility to review the results. You can easily view the results in multiple ways: online (make.powerapps.com), during export or in your local drive. Reviewing results online will give you the ability to filter results in different helpful ways.
Viewing Solution Checker results online
The cool thing about this checker is, it can detect missing functions that are set in your form properties’ onload, onsave and on change events. Example error: An event registration entry was detected on the form Contact for the entity Contact for the event onload where the function does not appear to exist in the referring web resource script, [name of the web resource file]. The function name defined is [name of function]. This will likely cause issues when trying to invoke the event.
Example of an actual medium severity result
I hope this helps you improve the quality of your solutions. Let me know in the comments below how this helps you or if you would like to share some tips for everyone to learn.
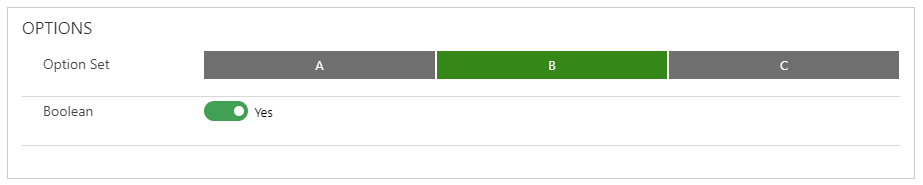
Did you know that you can easily configure fields to a really cool custom control in Dynamics 365 without any sort of coding? Check this out!
You can simply convert a Single Line of Text or Currency/Number fields to an Auto Complete, Business Card, Slider, Knob or a Star Rating control just through configuration. Here’s how:
Navigate to Field Properties and add the custom control of your choice. Depending on what can meet your business requirements, you can set up each of the fields to spice up the user experience.