The requirement is to add a ribbon button so a Customer Service Agent can easily create a Phone Call with minimal clicks in the Unified Client Interface of Dynamics 365. We will also auto-populate the values in the Phone Call form.
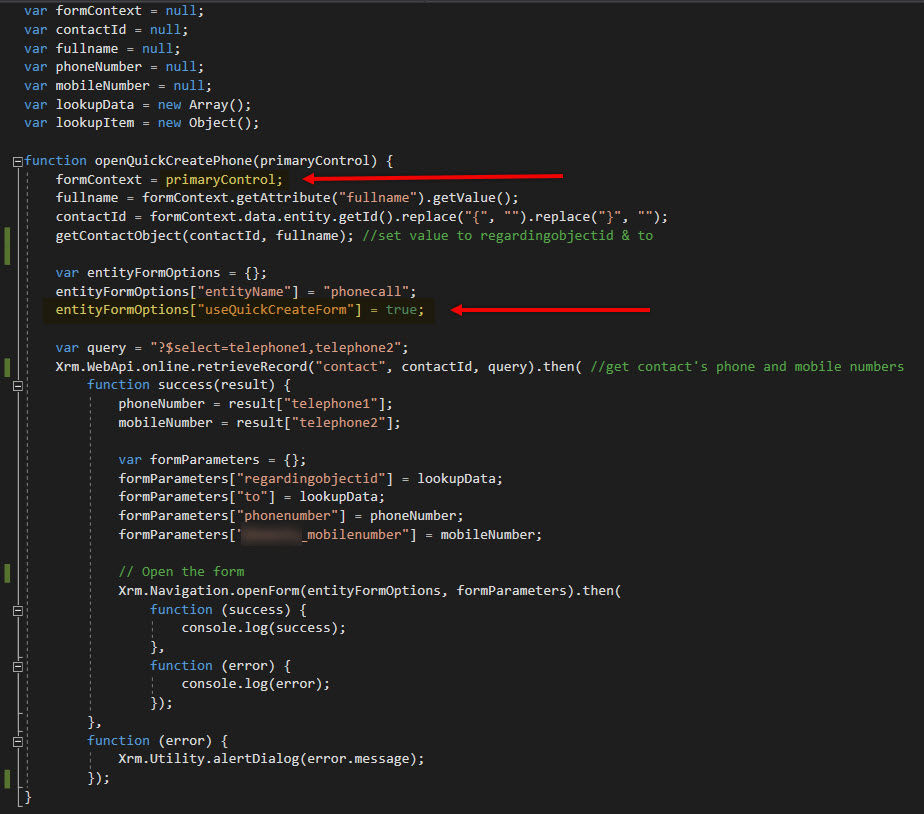
Step 1: Create a web resource js file where you will write the custom script to open the quick create phone call form.
Step 2: Add a custom ribbon button in the Contact form using the Ribbon Workbench.
Tip: Make sure that the solution you will open in the Ribbon Workbench only includes the entity you need to modify without all the assets. This will make publishing quicker.
Step 3: Add a Phone Call command in the Ribbon Workbench with CRM Parameter of PrimaryControl. This is the executionContext where you can easily get the attributes of the form.
Today, I will share with you some tips and tricks when adding custom scripts in your Dynamics 365 application. Here, I shared some of the common scenarios that may require you to write codes. The following scenarios are just examples; you might encounter different requirements, but the same solutions can be applied, so keep an open mind. I thought a one-page reference would be of good help, especially for those who are just exploring Dynamics 365 customization.
Scenario 1: Run a script on form load but ONLY when creating a new record.
Solution: Get the form type of the record and use it as your condition to ensure that you don’t load ALL scripts on every form load.
Syntax: if (formContext.ui.getFormType() === 1)
Value
Form type
0
Undefined
1
Create
2
Update
3
Read Only
4
Disabled
6
Bulk Edit
Form Type Return Values
Scenario 2: Every time you open a form, it says unsaved changes. This is because your form is dirty which means there are fields in your form that have changed. To find out what these fields are, you can use the developers’ tool available in your browser.
Solution: Press F12 while running Dynamics 365. Run the following script in the console and it will tell you the fields that you need to deal with.
Syntax: Xrm.Page.data.entity.getDataXml()
Scenario 3: You are required to set a value in your scripts which is only intended to control logic in the form. This becomes a dirty field.
Solution. Set submit mode to control how you want to save the field you changed programmatically. If you are not interested to store the value, you can choose to do so by setting the submit mode it as “never”.
Scenario 8: Need to pass a parameter when a certain field value has been changed.
Solution: Add the script file in the form properties and define the JS function in the onchange event of the field. Enable pass execution context as the first parameter.
OnChange Field Properties
Syntax: functionName = function (executionContext) { var formContext = executionContext.getFormContext(); }
Scenario 9: You are required to display a notification message on the form.
Scenario 10: You are required to display the field values from another entity or table.
Solution: Instead of re-creating those fields in the same entity create a Quick View Form. Another way is to create calculated fields to feed the field value of another entity.