If you have not heard yet, you can actually have a free development environment to build and test with Power Apps, Power Automate, and Microsoft Dataverse.
In the Microsoft Learn article, it explains that this plan enables you to:
Create apps and flows without writing code, with full-featured Power Apps and Power Automate development tools. Easily share and collaborate on these solutions with others.
Use a fully managed, scalable data platform with Dataverse, including support for common business application actions. Use out-of-the-box common tables or build your own data schema.
Export the solutions you create in your developer environment, and publish them on Microsoft AppSource so your customers can test-drive them.
For more information, please check out Microsoft Learn. Enjoy learning!
Today, I will share with you some tips and tricks when adding custom scripts in your Dynamics 365 application. Here, I shared some of the common scenarios that may require you to write codes. The following scenarios are just examples; you might encounter different requirements, but the same solutions can be applied, so keep an open mind. I thought a one-page reference would be of good help, especially for those who are just exploring Dynamics 365 customization.
Scenario 1: Run a script on form load but ONLY when creating a new record.
Solution: Get the form type of the record and use it as your condition to ensure that you don’t load ALL scripts on every form load.
Syntax: if (formContext.ui.getFormType() === 1)
Value
Form type
0
Undefined
1
Create
2
Update
3
Read Only
4
Disabled
6
Bulk Edit
Form Type Return Values
Scenario 2: Every time you open a form, it says unsaved changes. This is because your form is dirty which means there are fields in your form that have changed. To find out what these fields are, you can use the developers’ tool available in your browser.
Solution: Press F12 while running Dynamics 365. Run the following script in the console and it will tell you the fields that you need to deal with.
Syntax: Xrm.Page.data.entity.getDataXml()
Scenario 3: You are required to set a value in your scripts which is only intended to control logic in the form. This becomes a dirty field.
Solution. Set submit mode to control how you want to save the field you changed programmatically. If you are not interested to store the value, you can choose to do so by setting the submit mode it as “never”.
Scenario 8: Need to pass a parameter when a certain field value has been changed.
Solution: Add the script file in the form properties and define the JS function in the onchange event of the field. Enable pass execution context as the first parameter.
OnChange Field Properties
Syntax: functionName = function (executionContext) { var formContext = executionContext.getFormContext(); }
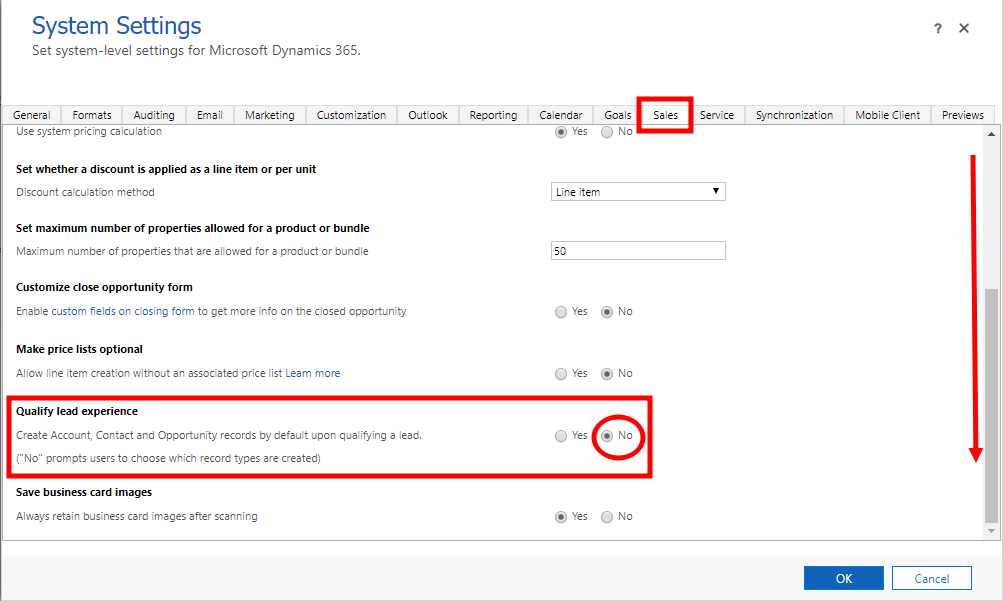
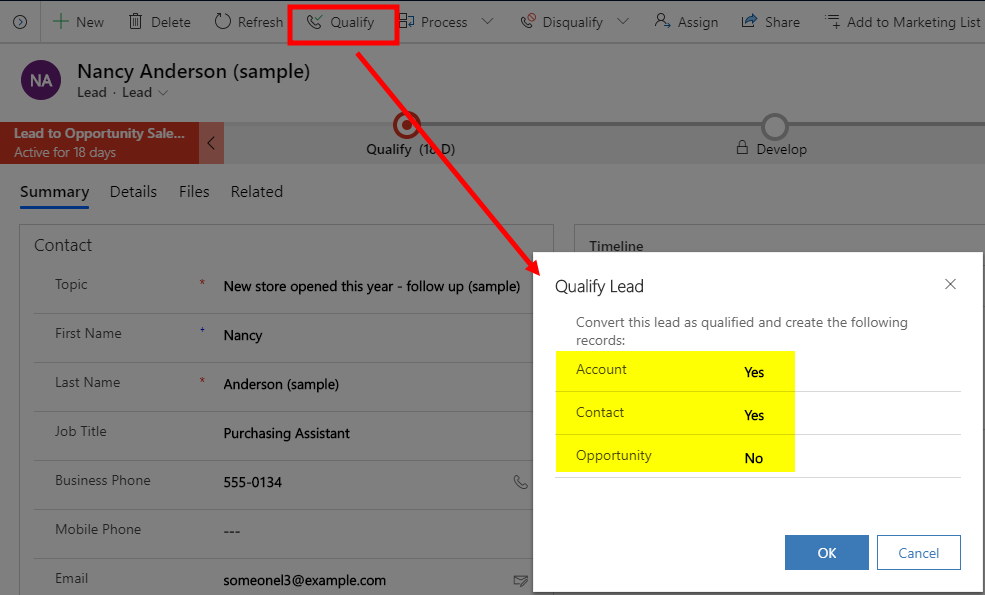
Scenario 9: You are required to display a notification message on the form.
Scenario 10: You are required to display the field values from another entity or table.
Solution: Instead of re-creating those fields in the same entity create a Quick View Form. Another way is to create calculated fields to feed the field value of another entity.
Learn more about the Powershell cmdlets here. It is in preview mode but users with a valid Power Apps license can perform the operations in these cmdlets. Note that you can only perform these with the resources you have access to. More information here.
Note: Environments that can be restored are environments deleted by an administrator and not those deleted by the system due to license expiration and other scenarios.
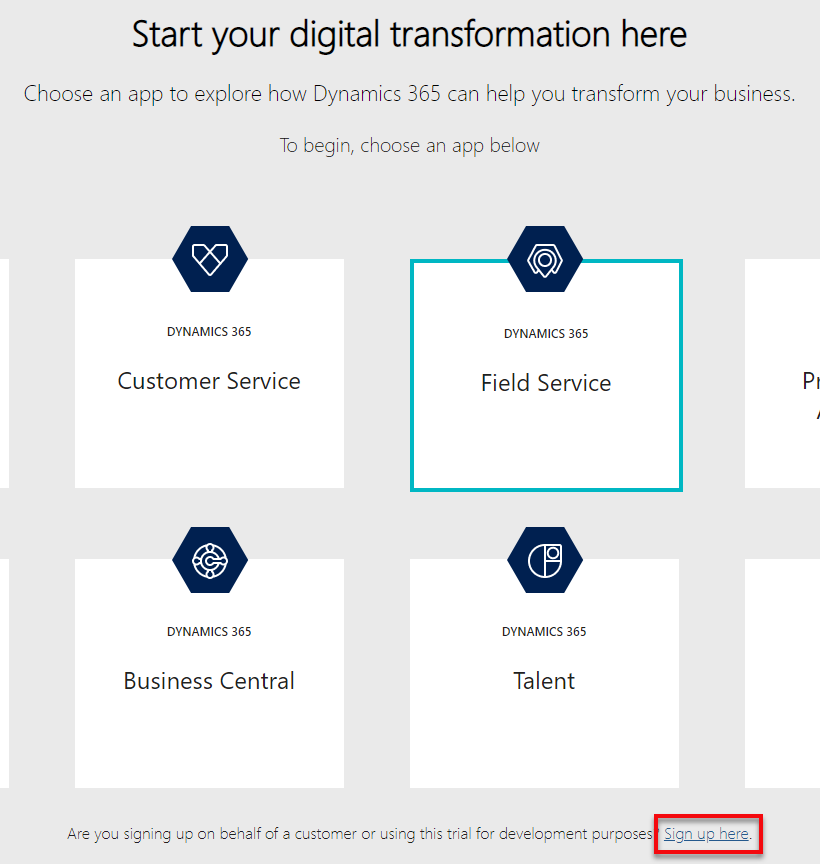
Looking to kick off Dynamics 365 Field Service trial environment with demo data? Well, you’re in the right place.
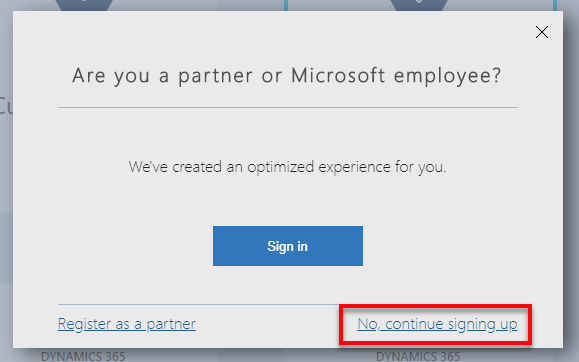
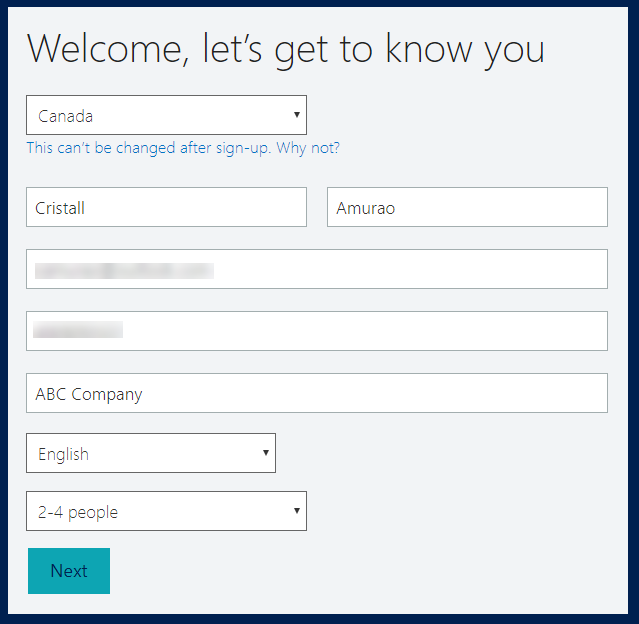
Make sure you have a valid email address and phone number. It does not have to be a work email. You can use an outlook account like what I did in this demo. Then, go to Dynamics Trial, select Field Service and click on Sign up here.
Once it’s up, you can start preparing the demo data installation.
There are a bunch of things you need to pre-configure before you can install the Fabrikam Manufacturing Demo Data.
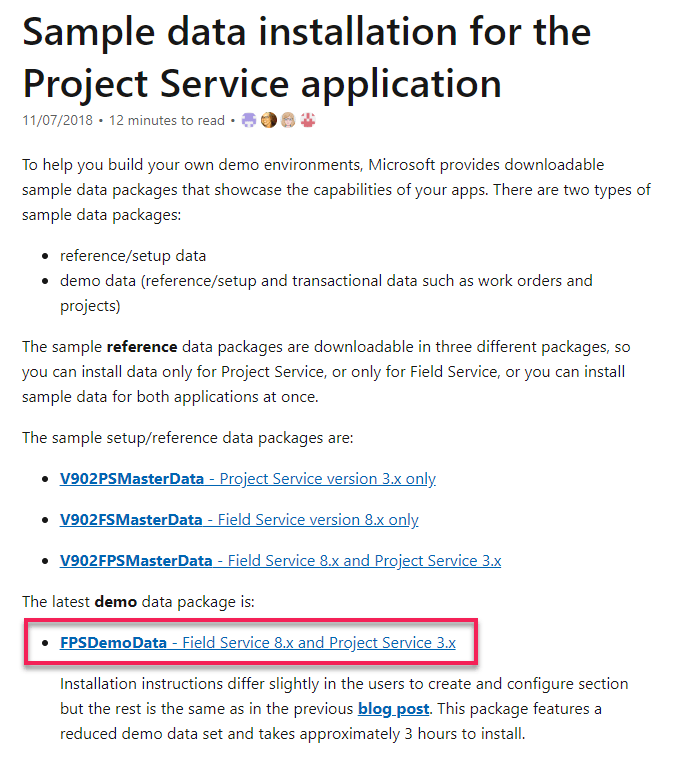
Download the demo data and unpack. For US consumers, you basically just need to follow the steps on this link. For non-US consumers, you may have to encounter some other issues like date format, etc.
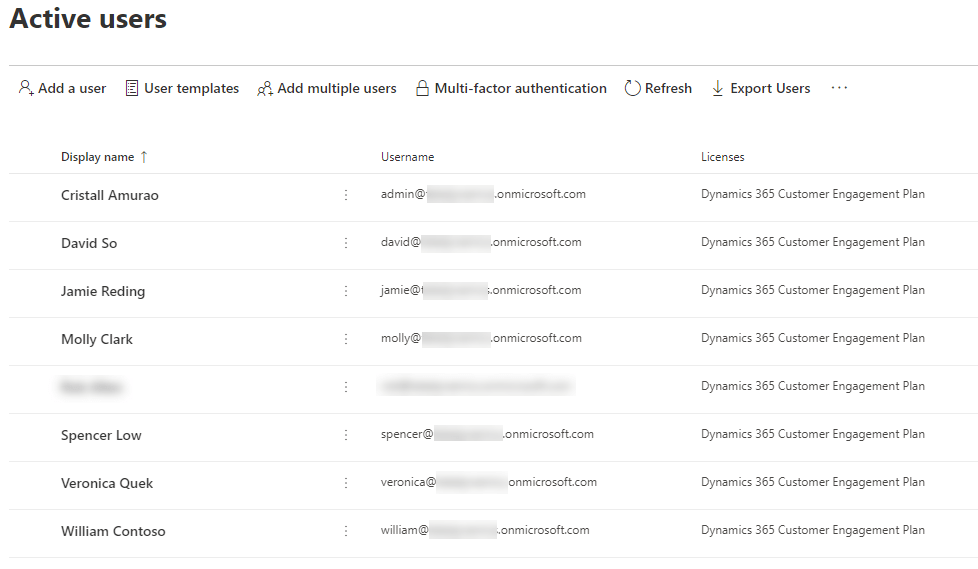
2. Create and configure users in Office 365. Make sure you assign Dynamics 365 license for each of them so their names will appear in Dynamics 365 Users list (Settings > Security > Users). Keep notes of the username you set for each of them as these are important for the configuration later on.
3. Once it appears in Dynamics 365 users list, set System Administrator role to each of them.
4. Go to the extracted Demo Data file (PackageDeployer_FPSDemoData_v3007) you just downloaded and open PkgFolder and then find and open ImportUserMapFile.xml. Now, paste the email address you created for each user in Office 365. Also, set the DefaultUserToMapTo= field to the email address of the Spencer Low user.
5. In the same folder (PkgFolder), find and open DemoDataPreImportConfig.xml and find the <userstocreateandconfigure> tag. Update the <login> tag with the username (case-sensitive) you set for each user from step 2.
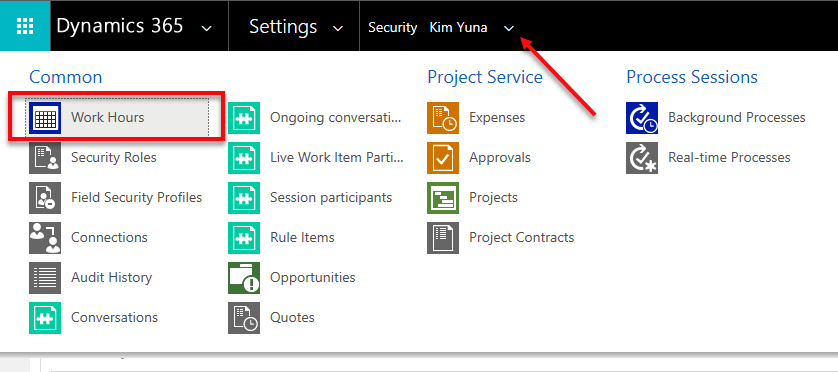
6. Setup a work hour template for Spencer Low. Navigate to Settings > Security > Users, find/open “Spencer Low” user.
While in the user form, navigate on the top menu and select Work Hours.
Click on the calendar and select More Actions > Edit. Select Entire recurring weekly schedule from start to end option and ensure the Work hours are set to 8 AM – 5 PM (9 Hours), Monday to Friday and with the Timezone set to Pacific Time (US & Canada). This is needed to ensure that the Project and Schedule board show as expected.
7. Before running the Package Deployer, check the following in Advanced Find to avoid encountering issues during the installation.
Confirm that there is no more than one active Organizational Unit record, and then renaming it to Fabrikam US.
Confirm that there is no more than one active Work Template record.
Confirm that there is no more than one active Project Parameter record, and then renaming that entry to Parameters
Common Issues & Fixes:
The pre-import process failed: Organisation should have no more than one active ‘msdyn_organisationalunit’ (fix: step 7)
The pre-import process failed: ID for the user with login ‘davids’ not found (fix: step 5)
Renaming Default Work Order Template failed with error: ID for User with login ‘davids’ not found (fix: step 6)
Now, you are ready to run PackageDeployer.exe.
Let me know how it goes in the comments down below.
If you started your implementation with an older version of Dynamics CRM and had converted to the latest version or to using Unified Client Interface, and you want to ensure that your solutions are written based on best practices, Solution Checker will come in handy.
December 2018 when Microsoft started to feature it in public view. Based on the customers that used it, it helps them in resolving lots of issues and have seen 20% performance increases on their form loads.
How to get started? Go to the Power Apps portal and head on to Solutions. Select the solution you would like to check, and you will see the Solution Checker button.
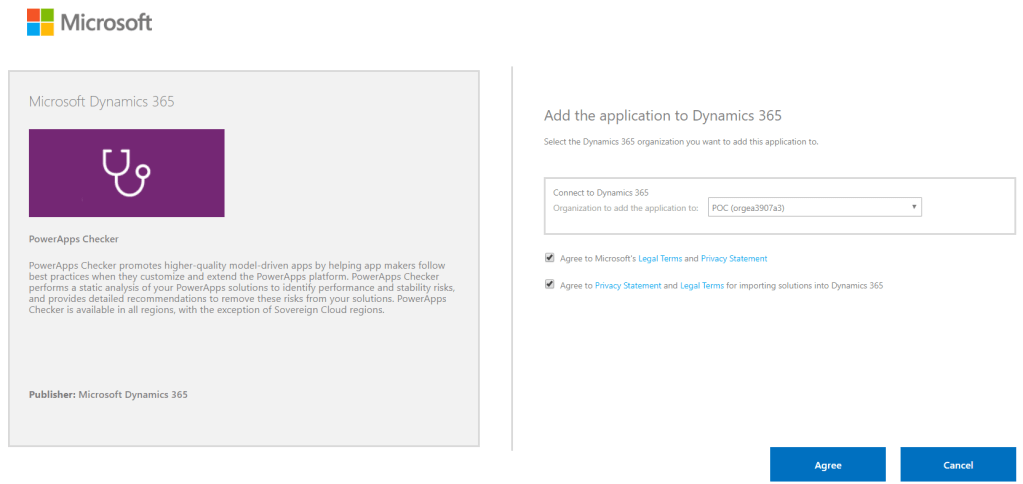
For first time users, it will show you an option to install the solution. Installing it will direct you to the AppSource site. Click on Get it now, and it will redirect you to a page where you need to select the environment you would like to use it for. Click Agree and wait.
AppSource: PowerApps Checker
Note: Every new and existing CDS for Apps environment will now have the solution installed automatically
Before you are able to run it, make sure you have the proper Security Roles in your common data service environment. Two of the required permissions are Export Customizations and Solution Checker.
Required Security Roles to run Solution Checker
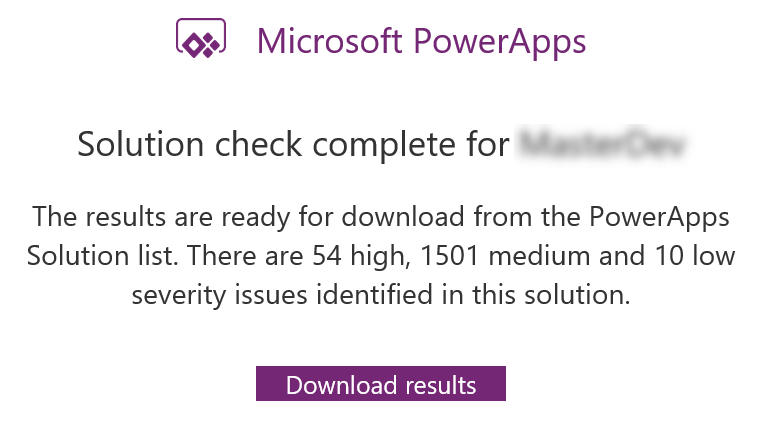
You know when it’s done when Power Apps sends you an email with the high level results.
What I really like about Solution Checker is the flexibility to review the results. You can easily view the results in multiple ways: online (make.powerapps.com), during export or in your local drive. Reviewing results online will give you the ability to filter results in different helpful ways.
Viewing Solution Checker results online
The cool thing about this checker is, it can detect missing functions that are set in your form properties’ onload, onsave and on change events. Example error: An event registration entry was detected on the form Contact for the entity Contact for the event onload where the function does not appear to exist in the referring web resource script, [name of the web resource file]. The function name defined is [name of function]. This will likely cause issues when trying to invoke the event.
Example of an actual medium severity result
I hope this helps you improve the quality of your solutions. Let me know in the comments below how this helps you or if you would like to share some tips for everyone to learn.
Did you know that you can easily configure fields to a really cool custom control in Dynamics 365 without any sort of coding? Check this out!
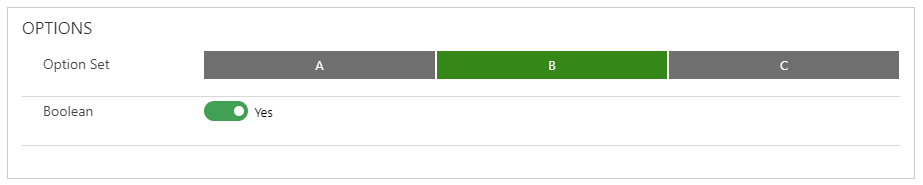
You can simply convert a Single Line of Text or Currency/Number fields to an Auto Complete, Business Card, Slider, Knob or a Star Rating control just through configuration. Here’s how:
Navigate to Field Properties and add the custom control of your choice. Depending on what can meet your business requirements, you can set up each of the fields to spice up the user experience.
Whether you are someone who wants to jump-start your career, or someone who wants to become certified, or an individual who just wants to grow their knowledge through in-depth learning and gain more confidence on Power Platform, Azure or Dynamics 365 on your own pace, here are the best place for you to go and learn.
Microsoft Learn – Microsoft has launched an improved learning portal a few years back and has published great content to help developers, architects, and IT administrators of all backgrounds to help them achieve more. I remember having to work on Azure or Dynamics CRM back in the day and cannot find any site to learn real-world examples to help me out. No worries because you will find a lot of helpful content now as Microsoft is committed to empowering everyone and has given us guided learning on all of their platform products and services that we can learn at our own pace. You can now explore their Learning Path to learn specific modules of your choice.
Udemy – This is my go-to place in learning more about Microsoft products from a different perspective. Tons of content creator shared a very detailed tutorial and excellent content to help you either pass your Microsoft certification or learn tips and tricks from their real-world experiences.
Enjoy learning and continue to inspire. If you know other learning sites and want to help out the community, please feel free to share it in the comments box below. 🙂